Defining of HW variables for a communication channel
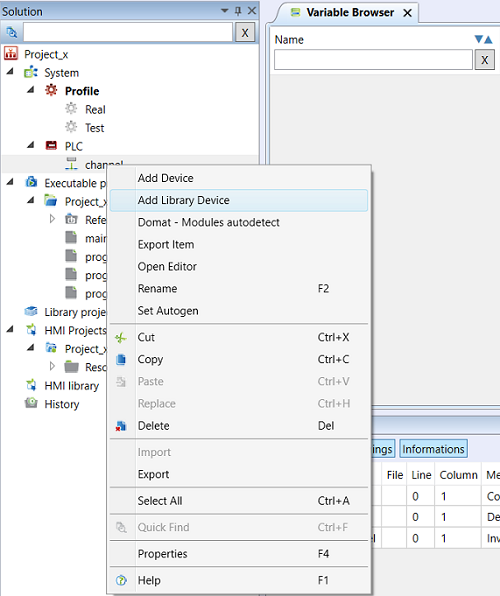
As soon as we have a communication channel defined, variables to communicate must be defined. There are three ways:
The main difference between an existing device and general device is that for an existing device, just several parameters which are common for a group of variables is set, while at a general device the communication properties of every physical variable must be defined. Typical library devices are Domat I/O modules which have Modbus maps available. However, users are not limited by the primary choice from existing devices, but they can define a general device and save it into a library. At the next deployment of this device, it can be retrieved from the library, and inserted into a project.
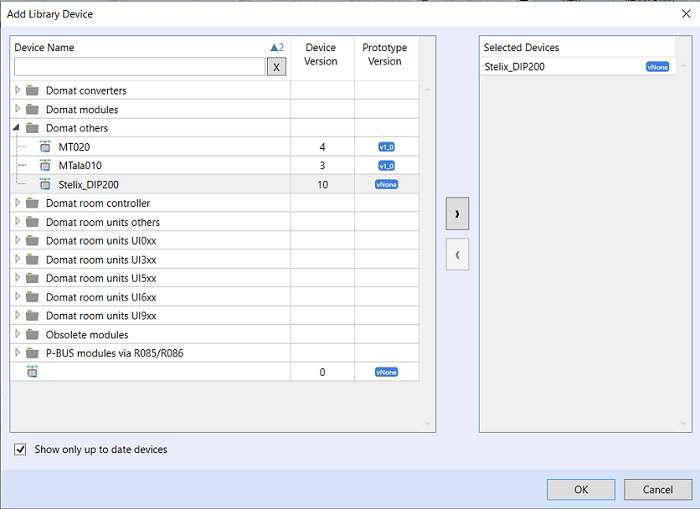
Add existing device from library
Select an I/O module in the module library. Most of the Domat devices use Modbus as the communication protocol. In order for the Add library device option to be available, Modbus protocol must be set up in the channel as protocol type.
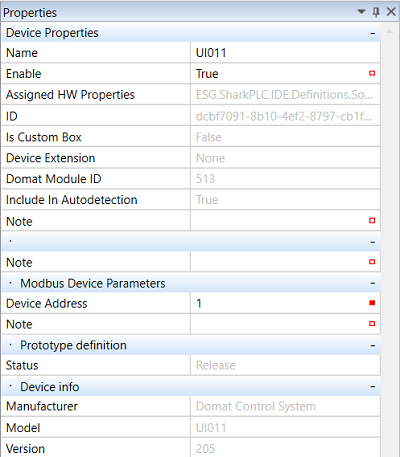
Assign a name to the module and set its Modbus RTU slave address (Device Address) in the project.
Add a general device
Settings of communication parameters for different communication protocols may be very different. It is necessary to know the meaning of all parameters of a certain protocol in order to configure the communication correctly. We will show how to define communication properties for a Modbus RTU device, where a variable is defined by the Modbus function code, register (or bit) number, and Modbus slave address. We will use a UI… room unit as an example.
The Modbus register maps for UI… room units are available at http://domat-int.com/en/downloads/technical-documentation/modbus-tables
Right-click the communication channel and Add device. Click it to display its properties. In the Device properties in the first row assign a name to the device: e.g. UI_01 - a UI room unit at Modbus address 01. Double click the device (in the solution project structure) display the editor.
Variables to read
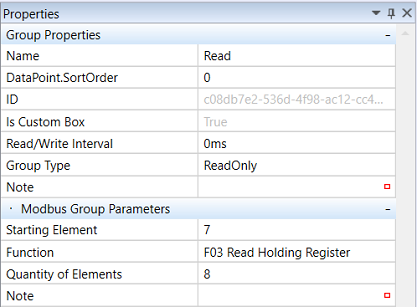
Create variables “set_temp” and “actual_temp”. The values are available in registers 11 and 17 respectively, use Modbus function 03 „Read holding registers“ to access them. As the registers are read in groups rather than individually, right click the workspace, and Add group.
The group will be Read-only. The first register to read is the lowest register, here 11. The number of registers to read is 7, as we need registers 11, 12….17, which is 7 in total. Quantity of elements is set by one register more, i.e. 8.
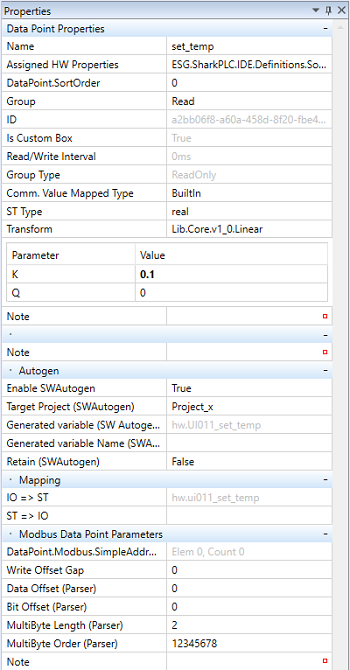
Now, in the “temp_read” group, create a variable named “set_temp” and assign following properties to it:
Group: to which group the variable belongs
Transformation: recalculation of the value - linear transformation has been chosen because the communicated value is a HVAC integer value, i.e. set temperature x 100. The transformation is defined by the equation Y=kx+q, where Y is the result (real value which will be used in the program), k is the multiplier, x is the input value, and q is a constant to be added (offset).
ST type: variable type in the program - here „real“
Comunication value maped type: here BuiltIn, if a variable is „bool“ then this type is „bit“
Data Offset: byte offset; how many bytes in the telegram from its beginning is the value start
Bit Offset: how many bits in the telegram from its beginning is the bit that should be read if this is a boolean value
MultiByte Length: how many bytes the value has, here 2 (a standard 16-bit Modbus register)
MultiByte Order: byte order if the variable consists of more bytes, such as 64bit integers
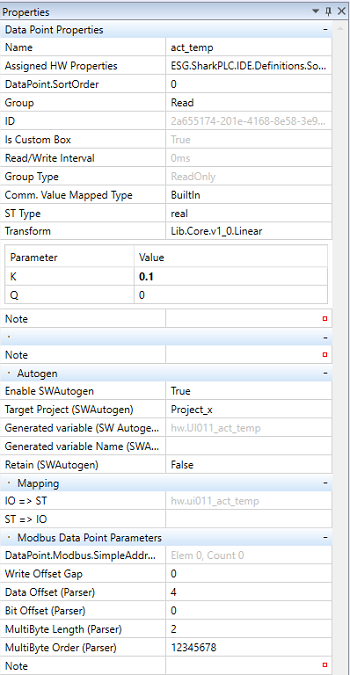
Similarly, the second variable „act_temp“ will be created.
The only difference between the variables is the Data Offset parameter. The number is given by the difference in register numbers, multiplied b the register length. Here, Data Offset = (17 - 11) x 2.
