Terminal text menu definition
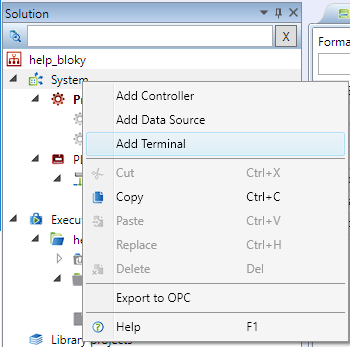
To create a Terminal device, right-click System and select Add terminal
The starting point for Terminal definition is to create a device of Terminal type and to create a new HMI template.
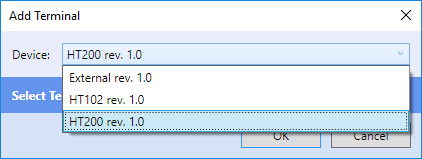
As a Terminal is created, select the appropriate type. “External” creates a Mervis Visual (formerly Mervis Menu Reader) definition. “HT102” and “HT200” are Domat hardware terminals.
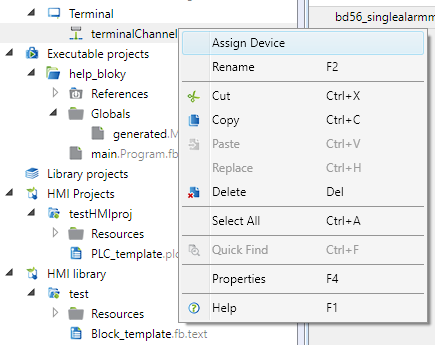
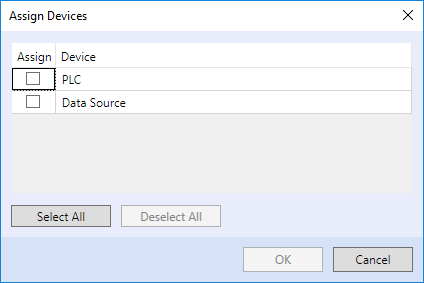
Add the PLC which shall provide data to the terminal to the “terminalChannel”. A Terminal device may access more PLCs concurrently. It also can connect to a Data source, which is a PLC defined in another Solution. (A Data source must be added into Solution - right click on System - in order to be available in the context menu below.)
This operation is very important for the next definition. The objects in terminal menu can only be bound to variables from PLCs which have been added to the “terminalChannel”.
Connection setting to a terminal and PLCs
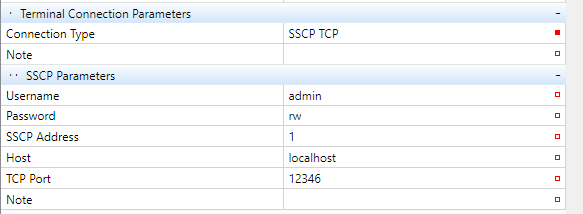
After a Terminal device has been created, its communication parameters must be set. The parameters are set in Terminal property grid: enter the terminal IP address, TCP port, username and password which will be used to upload the definition into the terminal device.
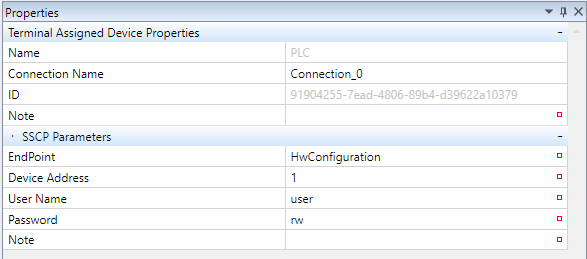
Next, define connection to devices which the terminal communicates with. Click the PLC which has been assigned to a terminal channel:
A PLC device type acquires the connection data (Endpoint) using one of the following ways:
- HwConfiguration - this reads the IP address and TCP port number from the PLC Properties, Network configuration. The terminal will connect to the IP address of the PLC. This option makes sense if both Terminal and PLC are in the same subnet.
- Deploy - this reads the IP address and TCP port number from PLC Connection parameters. This is used if the PLC is connected over a router with NAT, or, in general, over the Internet, and the connection does not follow to the local IP address of the PLC.
- Custom - the IP address and TCP port must be entered manually.
- To use a proxy connection to the PLC, select the “Custom” endpoint.
A Data Source device only has two options:
- Deploy - this reads the IP address and TCP port number from Connection parameters of the Data source.
- Custom - the IP address and TCP port must be entered manually.
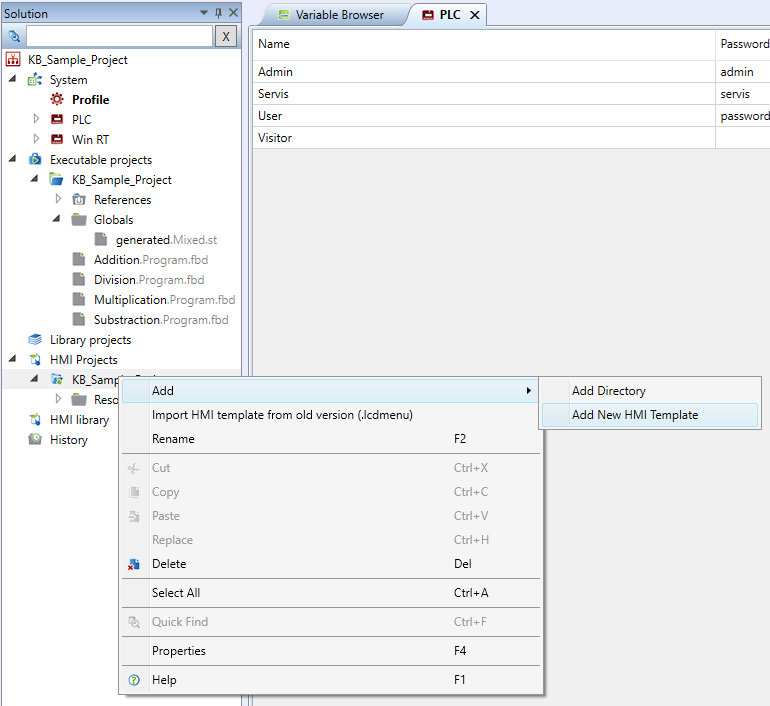
Creating a text template for Terminal
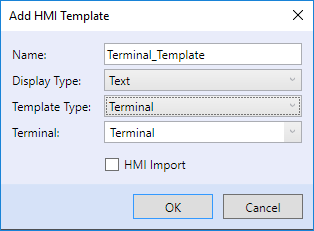
Then enter the name of the new template, display type, template type, and the terminal for which the definition is created. The display type is either “Text” - text template for a terminal with a tree menu, or “Graphic” - graphic template with panels for a graphic terminal. A text template then is created using Text display type:
The “HMI import” selector has a special function here. If the PLC which has been added to the “terminalChannel” already has a LCD menu definition, the“HMI Import” selection uses this definition and automatically creates an item for this PLC in the terminal definition. The complete definition which was used for the PLC will be automatically imported also into the terminal definition.
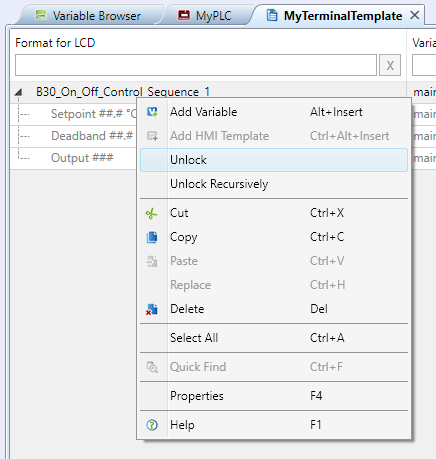
The part of definition taken over from the PLC will be greyed out. This means that the definition is locked: all changes executed on the PLC template will automatically appear also on the Terminal template. This part can be unlocked, which releases the template instance from the original PLC template.
The Unlock command only unlocks the PLC template, while all other embedded templates, like function block templates, will keep locked. The Unlock recursively command unlocks the PLC template and all embedded templates, and releases them from dependence on the source templates. A recursively unlocked template is fully editable. However, there are no bindings to the source template anymore, and any changes executed on the source template (e.g. on a PLC template) are not manifested in this template.
Ways to create a template
There are two ways how to create a terminal text template. They can be combined deliberately.
1. Using text HMI objects
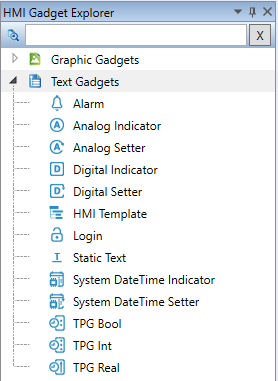
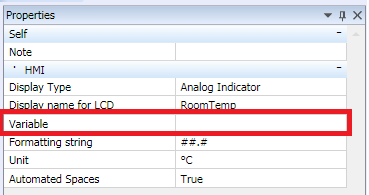
Work with text HMI objects is very similar to this with the previous generation of HMI Editor. There are 12 object types with different properties. The objects can be dragged and dropped to the HMI template, or inserted using a double click. Then a variable to display must be attached to the object instance.
Together with the variable attached, there are more properties which can be configured. The object properties are listed in "Text HMI objects".
2. Inserting variables directly into the text menu editor
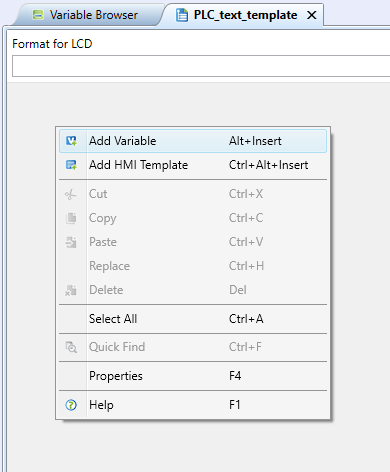
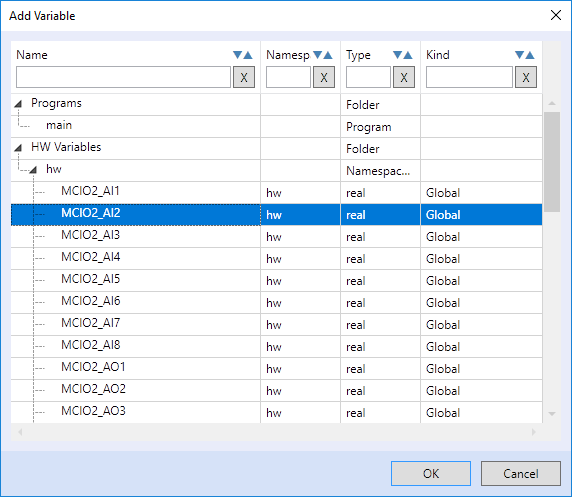
Another way is inserting variables directly into the text menu editor. Right-click the working area and select “Add variable”. In the following dialog there are all elements to choose from, be it variables or function blocks.
Select one or more variables using mouse and Ctrl / Shift keys.
3. Creating levels
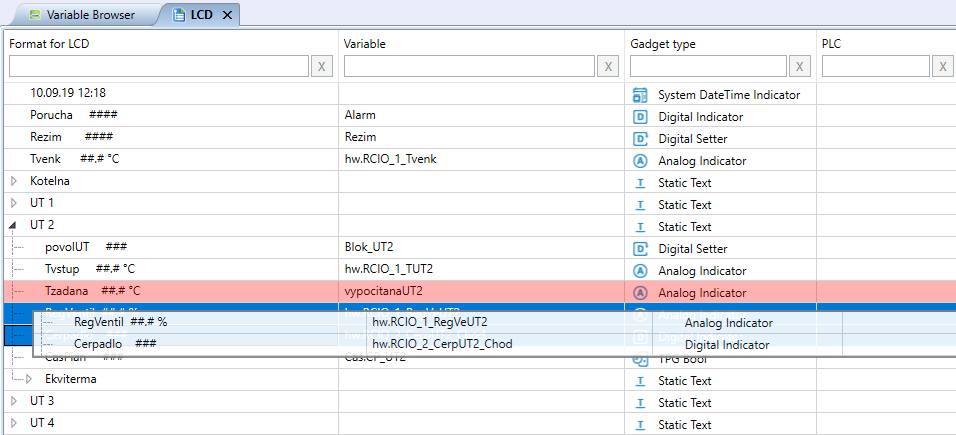
Under the “Login”, “Static text”, “Analog Indicator” and “Digital” objects “You can insert objects by selecting the object in the template and by clicking on “Move in” or. “Move out” in the top menu.
Or drag and drop objects onto “Login”, “Static text”, “Analog Indicator” and “Digital.” Indicator ”. The object will turn red when nested by dragging.
Importing a template from an external HMI editor
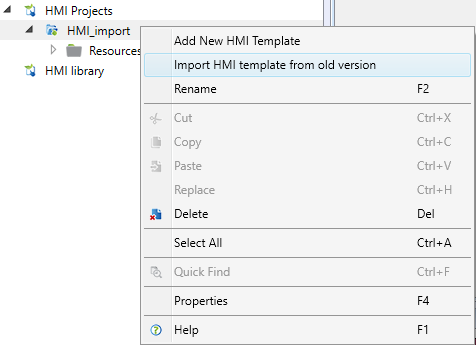
If you have created a template for the ht200 or ht102 z terminal external HMI editor, which was part of Mervis IDE ver. 2.3.0.x and lower, so To import this template into the report, right-click HMI project and select “Import HMI template from older version”.
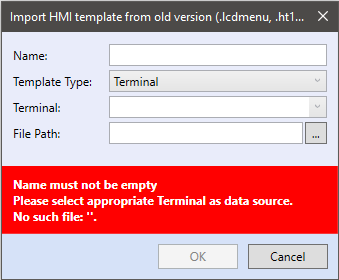
In the dialog, choose a template name, choose a template type, Terminal ke to which the template will be assigned and the path to the file created terminal menu.
Attaching a template to a Terminal
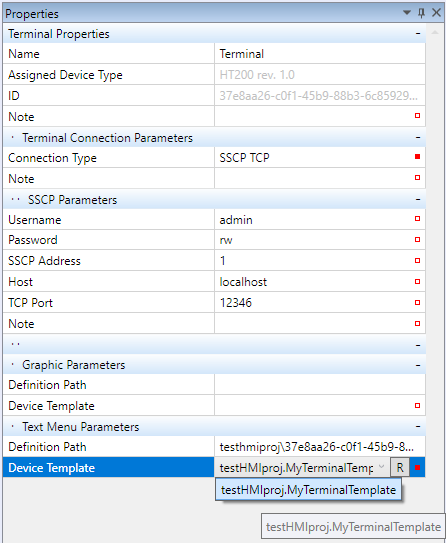
After a template is created, it must be attached to the Terminal in the Terminal properties. In the lower part there are Text menu parameters. Select the template to be used here. A *.txt file, which will be uploaded to the Terminal, is generated automatically.
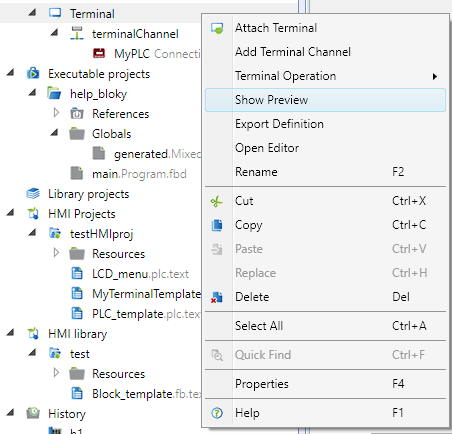
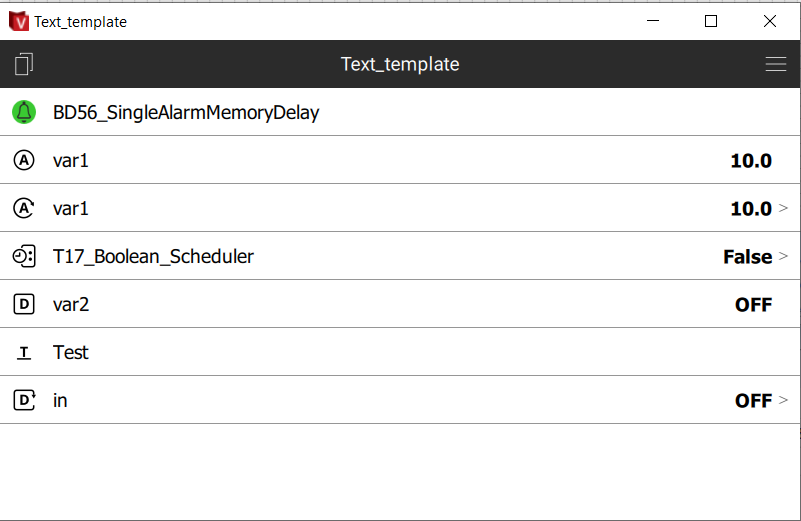
Right-click the Terminal and select Show preview. If there is a template selected in the Terminal properties, a preview will be launched.
If PLCs are online in your network, the preview works as a full-size control panel. The display is the same as on a HT200 terminal.
