Frequently asked questions
List of the most frequently asked questions which technical support answers
1) How to map a program to a PLC?
Open the PLC editor (double click the PLC or right click the PLC and open the editor). In the Task tab, click Program mapping.
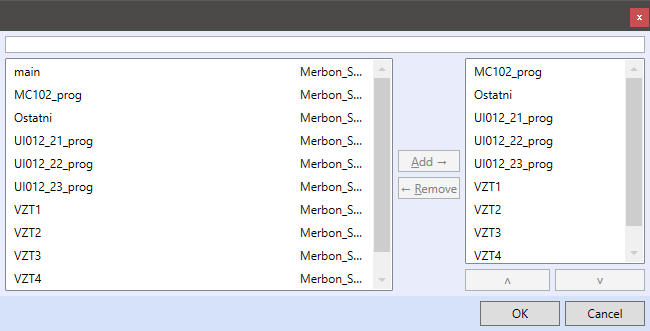
In the dialog window, select the programs to be added to a task.
In the left pane there are all programs available in a Solution, while the right pane contains programs which are already executed in the task. Click OK to confirm changes. To save all changes to project, click the OK button in the red dialog.
Remember to upload the Solution to PLC to activate all changes.
2) How to map a program to a PLC if the programs are locked?
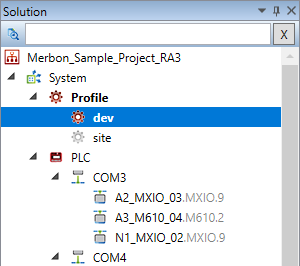
The programs to be mapped are locked, because you are in a derived profile.
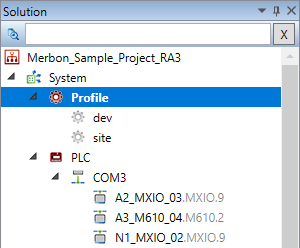
In the figure there is a derived profile named “dev“. Double click the „Profile“ to move to the root profile and unlock the programs for mapping..
To add a program, double click the mapped programs cell and select the programs to be mapped to a task.
In the left pane there are all programs available in a Solution, while the right pane contains programs which are already executed in the task. Clock OK to confirm changes. To save all changes to project, click the OK button in the red dialog.
Remember to switch back to the derived profile and upload the Solution to PLC to activate all changes.
3) Program mapping - Error message „There is no task defined for PLC“
If the project has been switched to Full mode, all programs have to be mapped to tasks manually. Double click the PLC or right click the PLC and Open editor. In the Tasks tab, right click the editor window and select Add task.
Select the programs to be mapped in the dialog window.
In the left pane there are all programs available in a Solution, while the right pane contains programs which are already executed in the task. Clock OK to confirm changes. To save all changes to project, click the OK button in the red dialog.
Remember to switch back to the derived profile and upload the Solution to PLC to activate all changes.
4) Number of tasks for a platform exceeded the platform limit.
At PLCs with FreeRTOS operating system, i.e. mark100, mark100v2, mark120, mark125, mark150, mark150/485, mark150s, mark150/485s, IMIO100, IMIO105, IMIO110, ICIO200, and ICIO205, the PLC can only host a single task which executes all mapped programs.
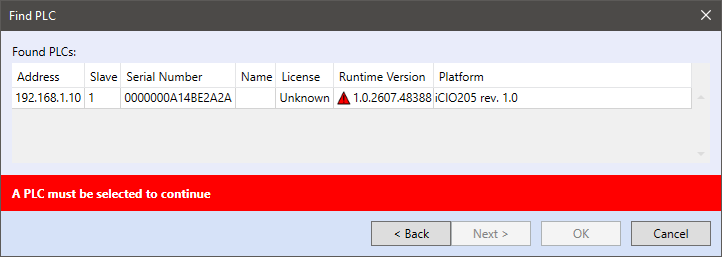
5) After a PLC is detected, a red triangle appears in the list, and my Solution can not be uploaded to PLC with error message „Target device contains old runtime, update necessary“
Error message „Target device contains old runtime, update required“.
In Solution, right-click the PLC, select PLC Operations and Upload RT. After the runtime is uploaded, attach the PLC again..
6) After restart, the PLC has IP address 192.168.1.10
Check the DIP switch „INIT“ on the PLC. If it is ON, the PLC is brought to default configuration after restart. See the respective PLC datasheet for more information.
7) When debugging, No value displays at a variable
Check in the PLC editor if there are all required programs attached to a task in Program mapping.
8) When debugging, no variable values are displayed at variables in FUPLA
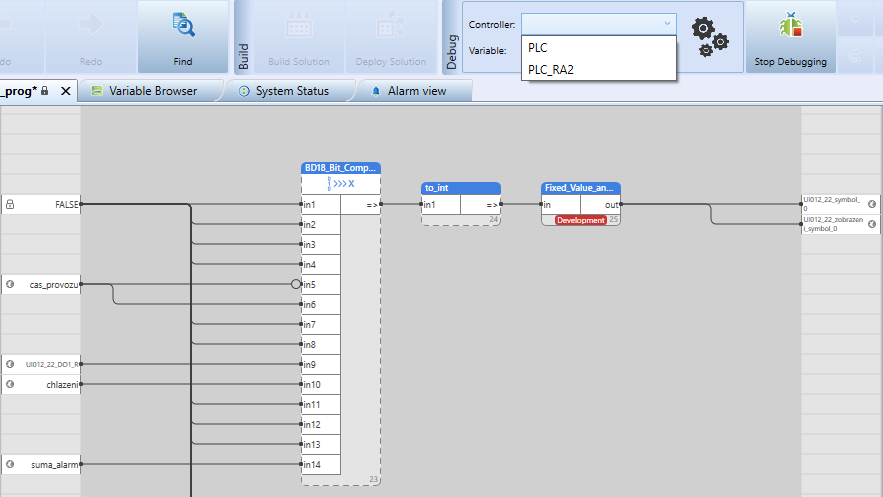
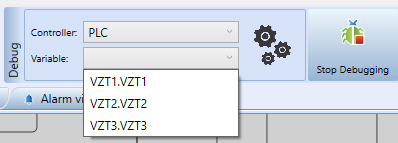
In the Debug tab, please select the controller which shall be debugged.
For a function block or function, select also its instance in the Variable drop-down box.
9) Hardware data points - Error message „You are over Hardware maximum allocated points“
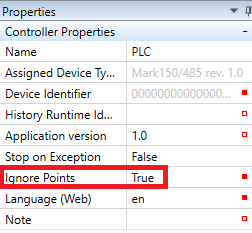
PLCs with FreeRTOS operating system have only limited resources for communication protocols and services. The load is evaluated by load points (these are not 1:1 with data points - inputs and outputs etc.). Counting of hardware points can be ignored in PLC properties by checking the Ignore Points option, however, it is not recommended for correct operation of the PLC.
10) Variable of a M-Bus meter returns wrong value
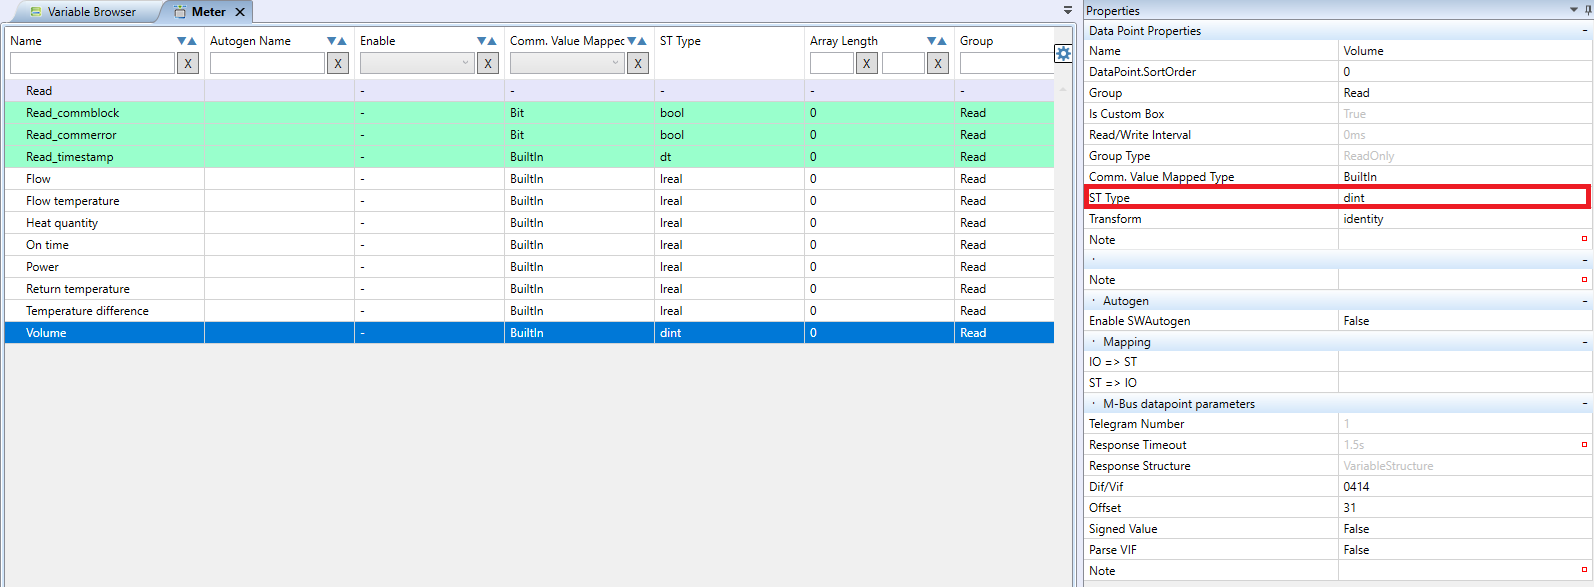
It is possible that the data type of the variable mapped in the PLC is out of range (overflow). Change the variable data type (ST Type) to a larger range data type (such as lreal rather than real) in the data point properties, and upload the solution. Note that the variable GUID is changed after this operation.
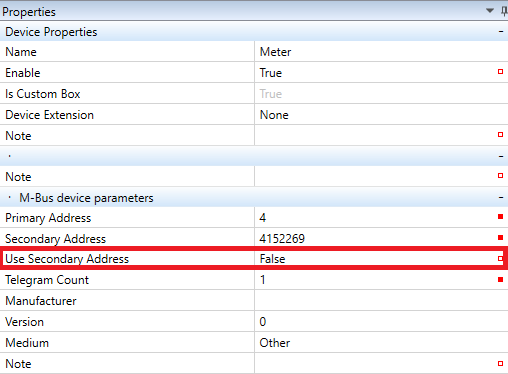
11) A meter does not communicate over secondary address
12) After a solution is compiled, variables from the added device do not show in Variable browser
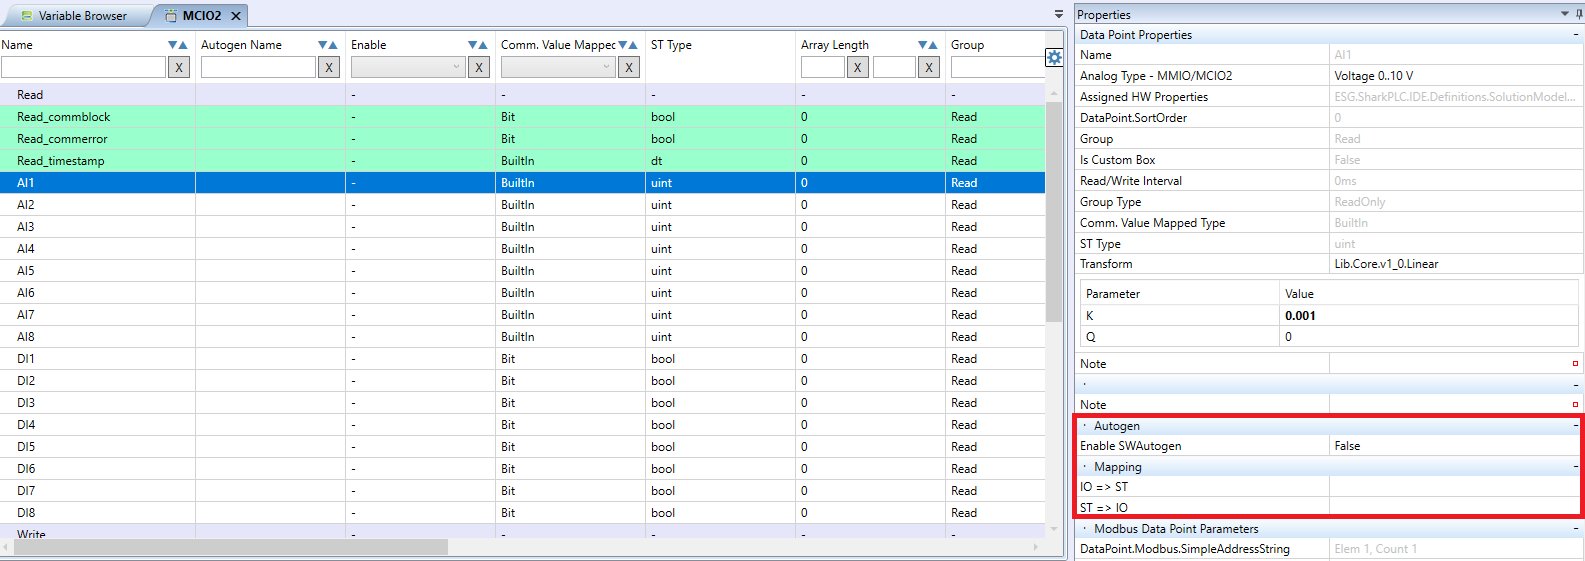
The variable in the device data point is not mapped. Either use Autogen for this hardware data point (recommended), or create a global variable and map it to the I/O point in Mapping IO ⇒ ST for reading, and ST ⇒ IO for writing.
13) Modbus over serial – wrong packets displayed in System status when communicating
To get rid of wrong packets, terminate the bus properly using BUS END switches at each end of the line. If this does not help, check the bus topology, bus length, cabling etc.
14) Modbus RTU, TCP/IP – wrong packets displayed in System status when communicating
To get rid of wrong packets, increase Timeout in the Modbus protocol parameters. Default (for Domat I/O modules) is 70 ms, while some 3rd party devices may require up to 250 … 300 ms. Upload solution to apply changes.
15) Grahics or text at the terminal are not displayed after definition upload
16) No variables available in the Add variable dialog in HMI Editor
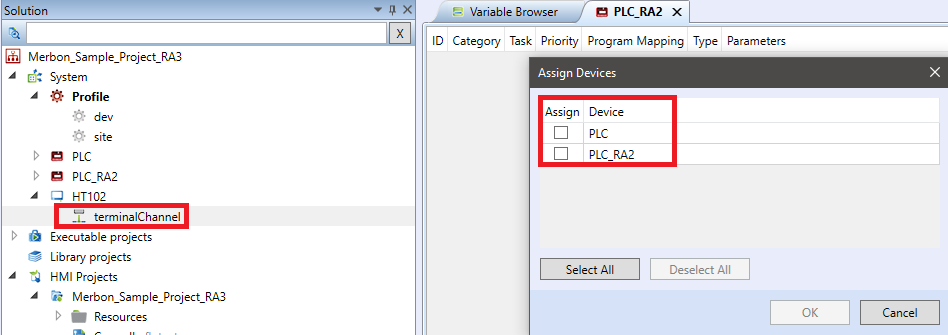
Terminal template: most probably there is no device assigned or program mapped at the terminal channel. Add the device to terminal channel by right-click on the channel and select Add device. In the terminal selection dialog, select the device to be added, and click OK.
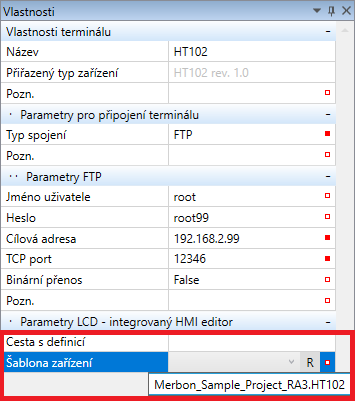
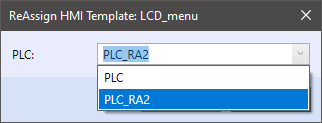
PLC template: reassign the template by right-click on the template in your HMI project, then select Reassign HMI template and select the PLC.
17) How to add an image to HMI
In the HMI project, right click Resources and select Add image. Images can be organized in folders: Add folder and add more images into a folder by right-clicking the folder and Add image here.
18) Can not log into a HT200 terminal
Double click the terminal editor or right-click the terminal to open the editor. In the User rights tab see the defined users , and their rights and passwords. Edit the records if necessary.
19) Can not upload a solution to terminal
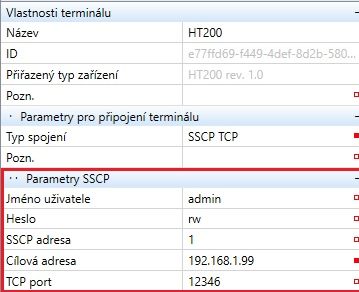
Check the SSCP parameters (user name, password, SSCP address, target address, TCP port) in the Terminal properties.
20) After a terminal is uploaded, there is no communication with data points
Check the SSCP parameter setting in the device in the terminal channel. The SSCP parameters must match those configured in the PLC.
21) Change of password for web (HMI editor version 2.3.0.x and older) does not apply
To apply the new password, PLC must be restarted. If the old password is still valid, delete the cache of your browser by CTRL + F5 or use anonymous browser mode.
22) Web (HMI editor version 2.3.0.x and older) displays objects with "?" even with correct password
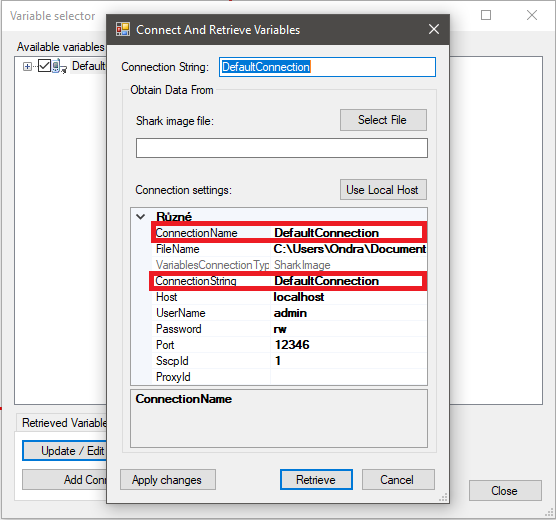
Check in your HMI project that in Variable manager (File → Variable manager) there is DefaultConnection at ConnectionName and ConnestionString.
23) I added new variables and function blocks, but they are not visible in HMI editor (HMI editor version 2.3.0.x and older) when editing the web panels.
Compile the solution again and add the updated image to the HMI. The image contains information about variables in your solution. Update the image in File → Variable manager and Select File. Select the .exs file and click Retrieve.
Version 2.4.x.x, which has the HMI editor integrated in IDE, updates the image automatically.
24) How to map an alarm in web project (HMI editor version 2.3.0.x and older)
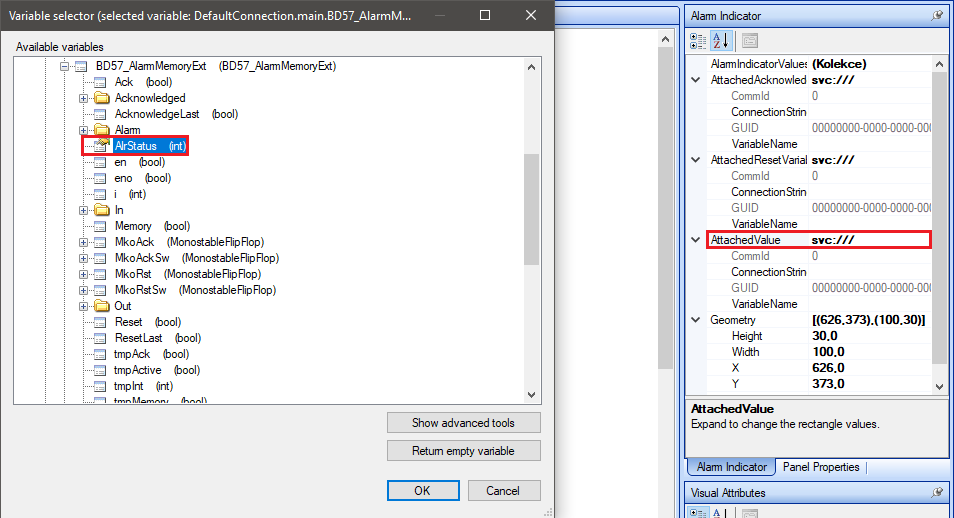
The alarm is mapped to the Attach Value property of Alarm Indicator object. In Variable Selector select the AlrStatus variable, which is inside of the alarm function block.
25) Deleting text / graphic definition from a terminal
To clear a terminal from a previously uploaded definitoin, right-click the terminal, select Terminal control and Delete text template or Delete graphic template.
26) Function blocks and variables do not display values in a program
Please make sure that the program name does not start with a numeral. If it does, backup your project and then rename the .scu files in a file explorer. Then go to the solution folder, delete all programs which start with a numeral, and add the renamed programs to your solution. After compilation, map the programs to the PLC tasks again, and upload the solution to PLC.
27) Frozen runtime (PLC does not run the uploaded project)
If the PLC refuses to run the uploaded project, stop the runtime by setting the DIP switch „STOP RT“ to ON and upload a (newly created) empty project to the PLC. This project shall not run immediately as the STOP RT switch is ON. Now, set the STOP RT switch to OFF, and upload the empty project again. Then it should be OK and launched successfully.

