Table of Contents
Terminal graphic menu definition
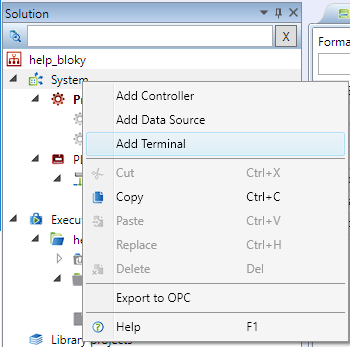
To create a Terminal device, right-click System and select Add terminal.
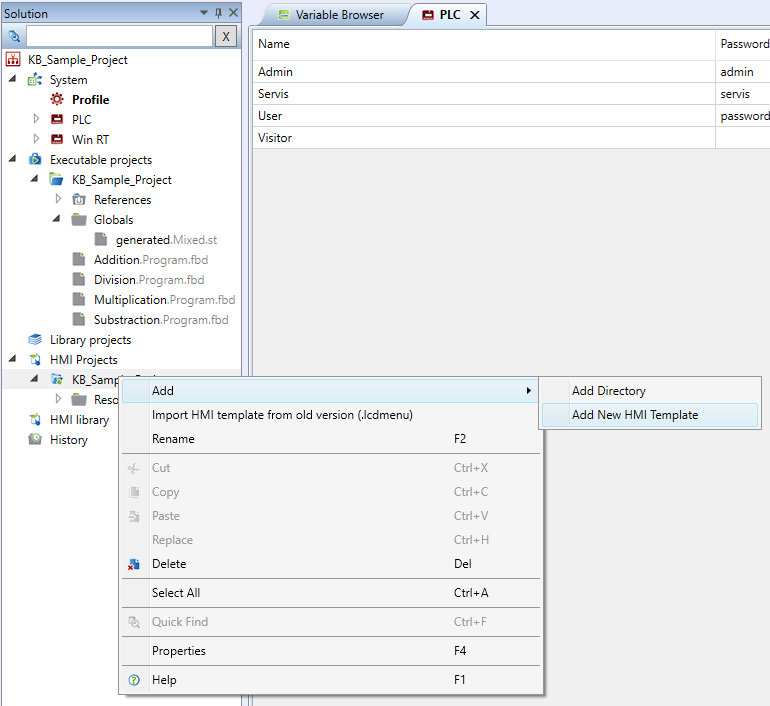
The starting point for Terminal definition is to create a device of Terminal type and to create a new HMI template.
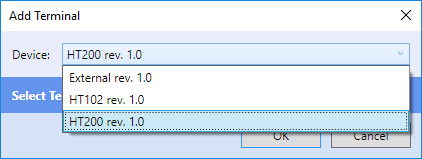
As a Terminal is created, select the appropriate type. “External” creates a Mervis Visual (formerly Mervis Menu Reader) definition. “HT102” and “HT200” are Domat hardware terminals.
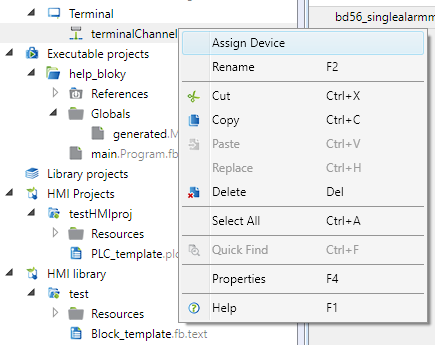
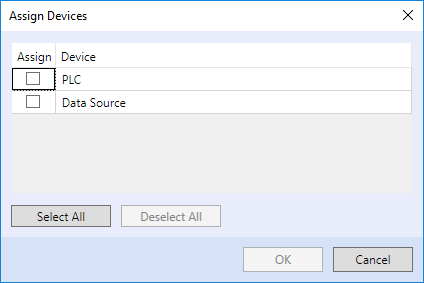
Add the PLC which shall provide data to the terminal to the “terminalChannel”. A Terminal device may access more PLCs concurrently. It also can connect to a Data source, which is a PLC defined in another Solution. (A Data source must be added into Solution - right click on System - in order to be available in the context menu below.)
This operation is very important for the next definition. The objects in terminal menu can only be bound to variables from PLCs which have been added to the “terminalChannel”.
Connection setting to a terminal and PLCs
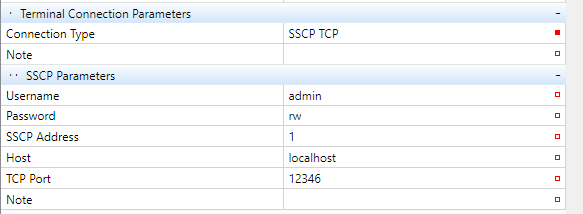
After a Terminal device has been created, its communication parameters must be set. The parameters are set in Terminal property grid: enter the terminal IP address, TCP port, username and password which will be used to upload the definition into the terminal device.
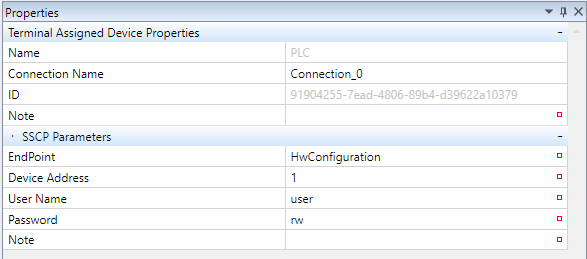
Next, define connection to devices which the terminal communicates with. Click the PLC which has been assigned to a terminal channel:
A PLC device type acquires the connection data (Endpoint) using one of the following ways:
- HwConfiguration - this reads the IP address and TCP port number from the PLC Properties, Network configuration. The terminal will connect to the IP address of the PLC. This option makes sense if both Terminal and PLC are in the same subnet.
- Deploy - this reads the IP address and TCP port number from PLC Connection parameters. This is used if the PLC is connected over a router with NAT, or, in general, over the Internet, and the connection does not follow to the local IP address of the PLC.
- Custom - the IP address and TCP port must be entered manually.
- To use a proxy connection to the PLC, select the “Custom” endpoint.
A Data Source device only has two options:
- Deploy - this reads the IP address and TCP port number from Connection parameters of the Data source.
- Custom - the IP address and TCP port must be entered manually.
Creating the template
The prerequisity for a HMI graphic template, again, is a Terminal device defined. Create a Terminal device as described in Creating a text terminal template.
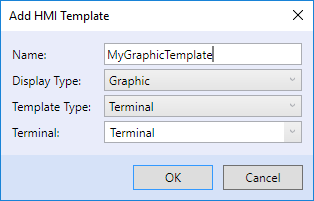
Then define the name and type of the template. Display type shall be “Graphic”. Template type shall be “Terminal”. The last item is Terminal: Select here the terminal device for which the template is designed. According to the terminal instance, it will be possible to attach variables which are defined at the “terminalChannel” devices of a particular terminal.
How to create the template
The graphic template is created in a similar way as in the previous fgeneration of the HMI Editor. Insert active objects into the working area, and bind the PLC variables to them.
Using graphic HMI objects
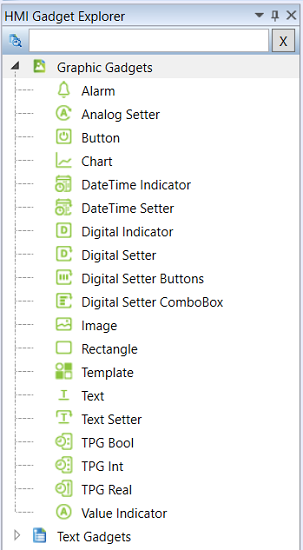
There is 14 HMI object types in the tree, each of them having different properties. These objects can be dragged and dropped into a HMI template. A PLC variable is then bound to the object instance.
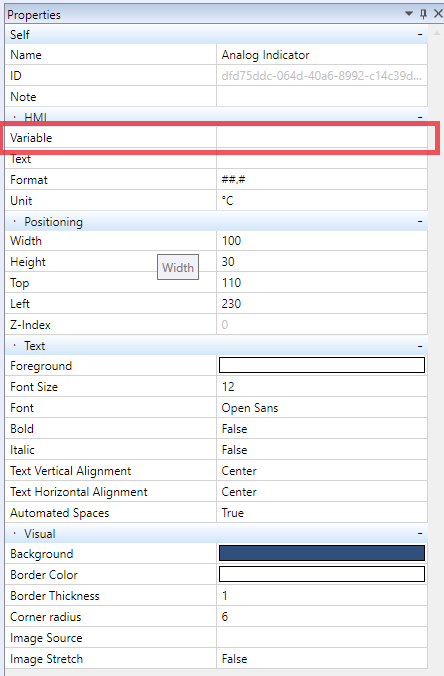
Apart from attaching the variable, it is also possible to change the other object instance properties. They are described in "Graphic HMI objects".
Graphic template properties
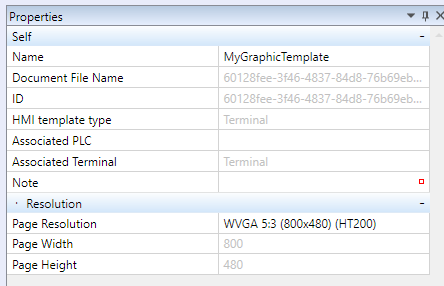
Every graphic template has its specific properties.
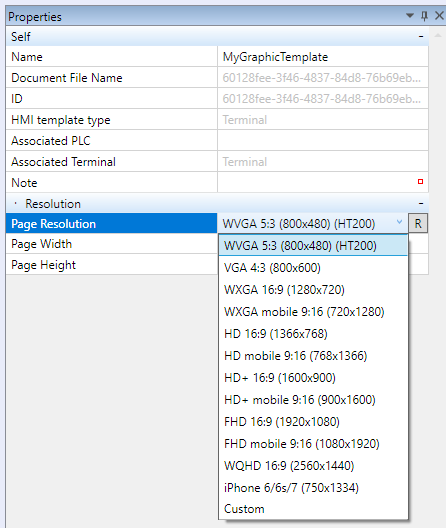
Editable properties are Template name and Page resolution.
Select the resolution from the drop down box according to your target platform, or select Custom to edit the resolution freely.
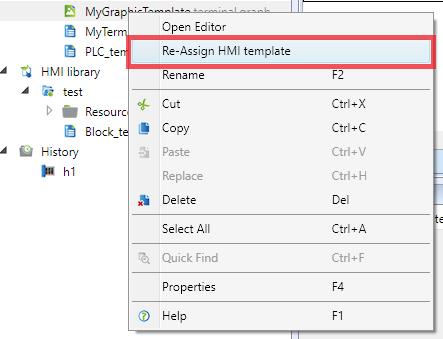
The attached terminal can not be changed in the Template properties. If you want to attach another terminal, do it in the template context menu.
Work with panels - pages
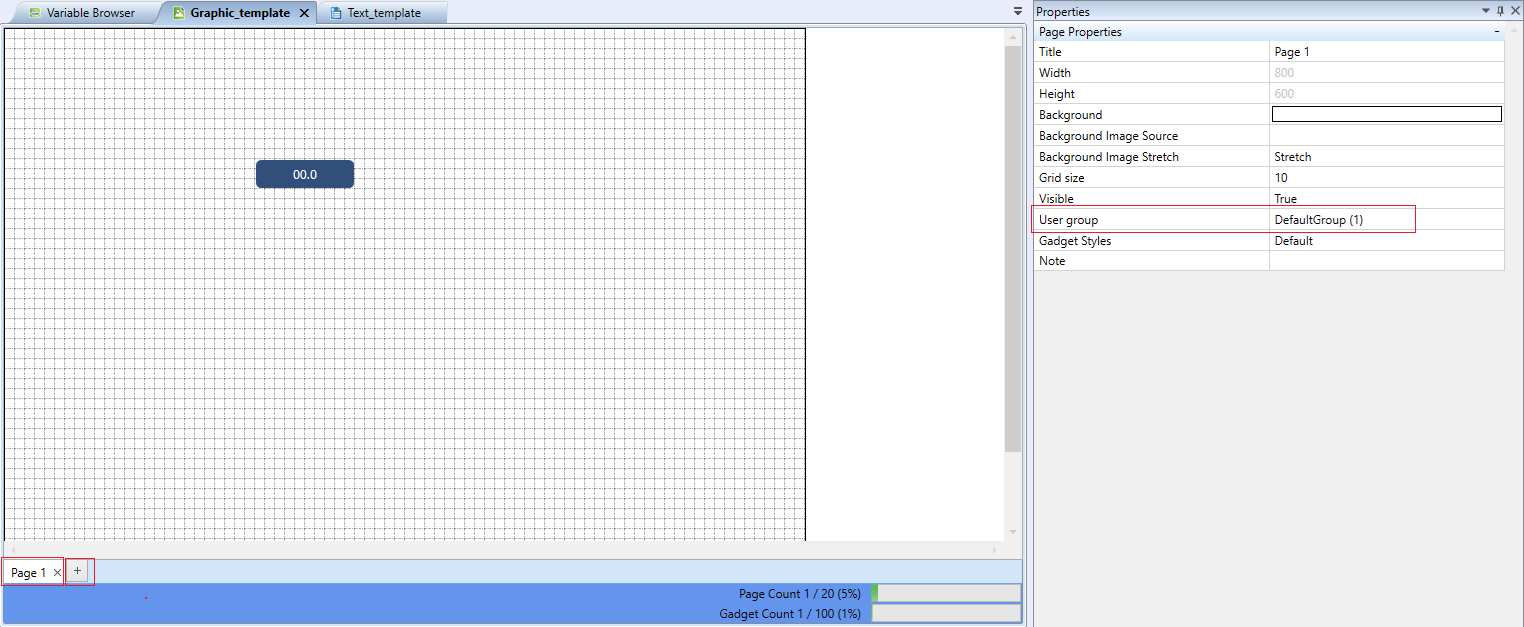
A graphic template consists of panels, or pages. Every page may have a different user policy on a terminal. The template editor may specify which users will be able to access which pages.
The order of pages in the bar is also used in the terminal, and in the appication. Use the “+” button to insert a page. The page name, as well as the user group which is allowed to access this page, can be changed in Page properties.
Page properties
- Title - Page name, as will appear in the list of pages
- Width / Height - Resolution of the graphic template, should fit the expected browser resolution, however, the page automatically fits in the available browser window
- Background - The IDE colour palette offers specific colours for IDE, the Mervis palette contains synchronized colours in Mervis style
- Background image source - Select a background image if required
- Background image stretch
- None (maintains original image size)
- Stretch (the image fits into the panel)
- UniformStretch (keeps aspect ratio when stretching)
- Grid size - Grid size in pixels, helps to align objects on the page
- Visible - Visibility in the Mervis Visual page menu (if not visible in menu, must be referenced by a button from another page to allow access)
- User group - Group of users specifying access rights for this page, see also User policy
- Gadget styles - Visual styles of gadgets, see also Creating styles
Jumping from graphical page to text tree menu
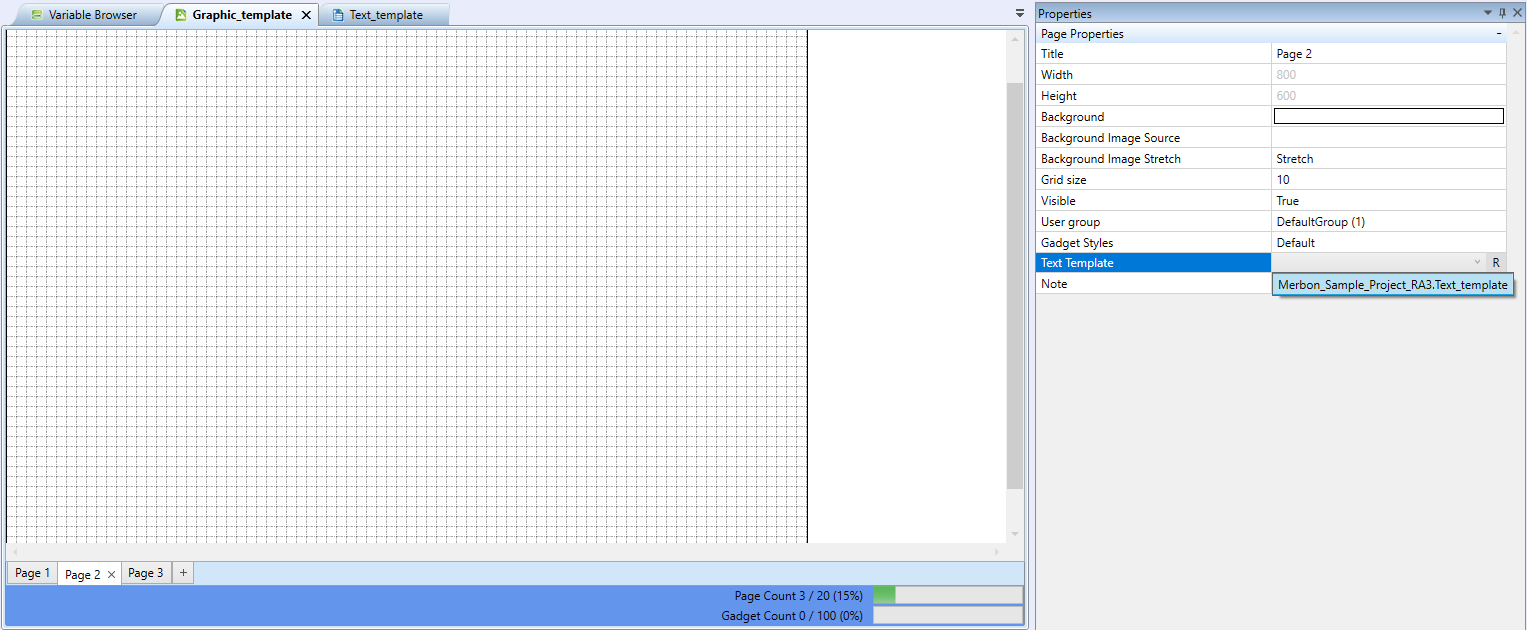
A graphical page may refer to a predefined text template rather than containing graphical objects (gadgets). Select a text template in page properties. The text template may then be referred from another page by a button pointing to this page: In the button properties, select the ID of the page which contains the text template.
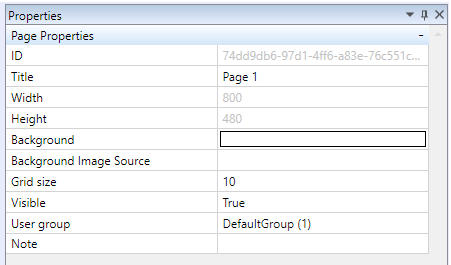
Page properties
- Title - name to be displayed in the terminal / application
- Width/height - parameters which are given by the template settings
- Background - select a colour to fill the background of the page. Every page may have a different background colour
- Background image source - path to a image in the HMI project. The image will be displayed on the page background. The image must be added to the HMI project resources in order to be usable here.
- Grid size - number of pixels to create an invisible grid to align the inserted objects
- Visible - visibility of the page. The page may be temporarily hidden from display on a terminal, e.g. if it has not been finished yet
- User group - select the group of users who will be able to display / control this page
Assigning of a Template to a Terminal
In the Terminal properties, select the tempate to be used for this Terminal. The box is in the lower part, Graphic parameters. Select the appropriate tempate here. After the template is selected, the corresponding files are generated automatically.
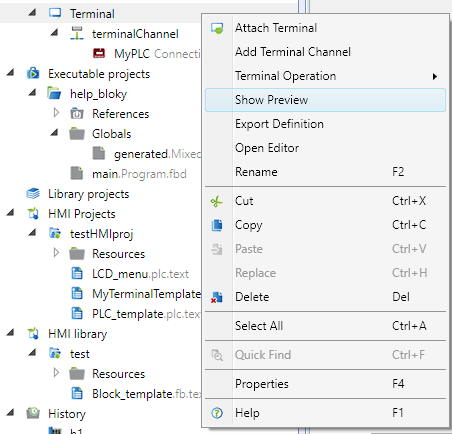
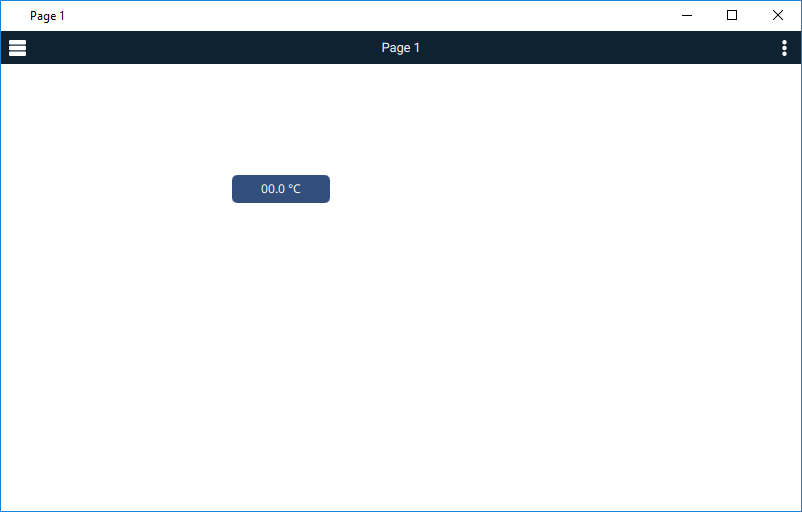
Right click the Terminal to Show preview. If a template is selected in the Terminal properties, a preview will be displayed.
If there are PLCs connected in the network, the preview works as a fully functioning control panel. The display is the same as on a HT200 terminal. The resolution is as set in the template properties.
