Table of Contents
Users
This section allows you to manage user accounts within your domain. From the main view, you can search for users, create, edit, delete accounts, manage their permissions, and configure authentication methods.
Security & Compliance Note: For regulated environments (e.g., pharmaceutical installations), Mervis SCADA automatically records audit trails for all user access events (logins, logouts, and failed attempts) including the user's identity, date, and time. System-wide security policies, such as automatic session termination after periods of inactivity (e.g., 15 minutes), are enforced at the domain level to prevent unauthorized access.
1. User Overview
At the top of the table, there is a Filter field for full-text user search. Below it is a list of all user accounts in the domain with the following data:
| Column | Description |
|---|---|
| Login | User's login name |
| First Name | User’s first name |
| Surname | User’s last name |
| User’s contact email address | |
| Phone | User’s contact phone number |
| Actions | Buttons for editing |

Row color indicators:
- Yellow – the account is in Blocked state
- Turquoise – currently selected user
2. User Details
Once a specific user is selected, a panel on the right side of the screen is displayed, divided into Properties and Authentication sections. These include contact details, account status, and login configuration.
Properties:
- Login – login name
- Fullname – full user identifier in the format “domain\username”
- First Name / Surname – user’s first and last name
- Description – additional information about the user (e.g., designated user role or department)
- Email – email address
- Phone – phone number
- State – current account status (e.g., Ok, Blocked)
- Valid From / Valid To – account validity period
Authentication:
- Last Login – date and time of last login
- Last Access – date and time of last access to Mervis SCADA
- Valid From / Valid To – password validity period
- Last Password Change at – date and time of the last password change
- Change Password After Login – flag to enforce password change on next login
- Change Password Before – date and time by which the password must be changed
- Notify Nearing Password Expiration in – how long before expiration warnings are shown
- Failed Login Attempts – To prevent unauthorized access, the system limits unsuccessful logins. By default, accounts are automatically blocked after 5 failed attempts.
- Multifactor Enabled – whether multifactor authentication is enabled
- TOTP Enabled – whether TOTP (time-based one-time password) is enabled
- TOTP Secret Key – indicates if a secret key for TOTP exists
- SMS Enabled – whether SMS authentication is enabled
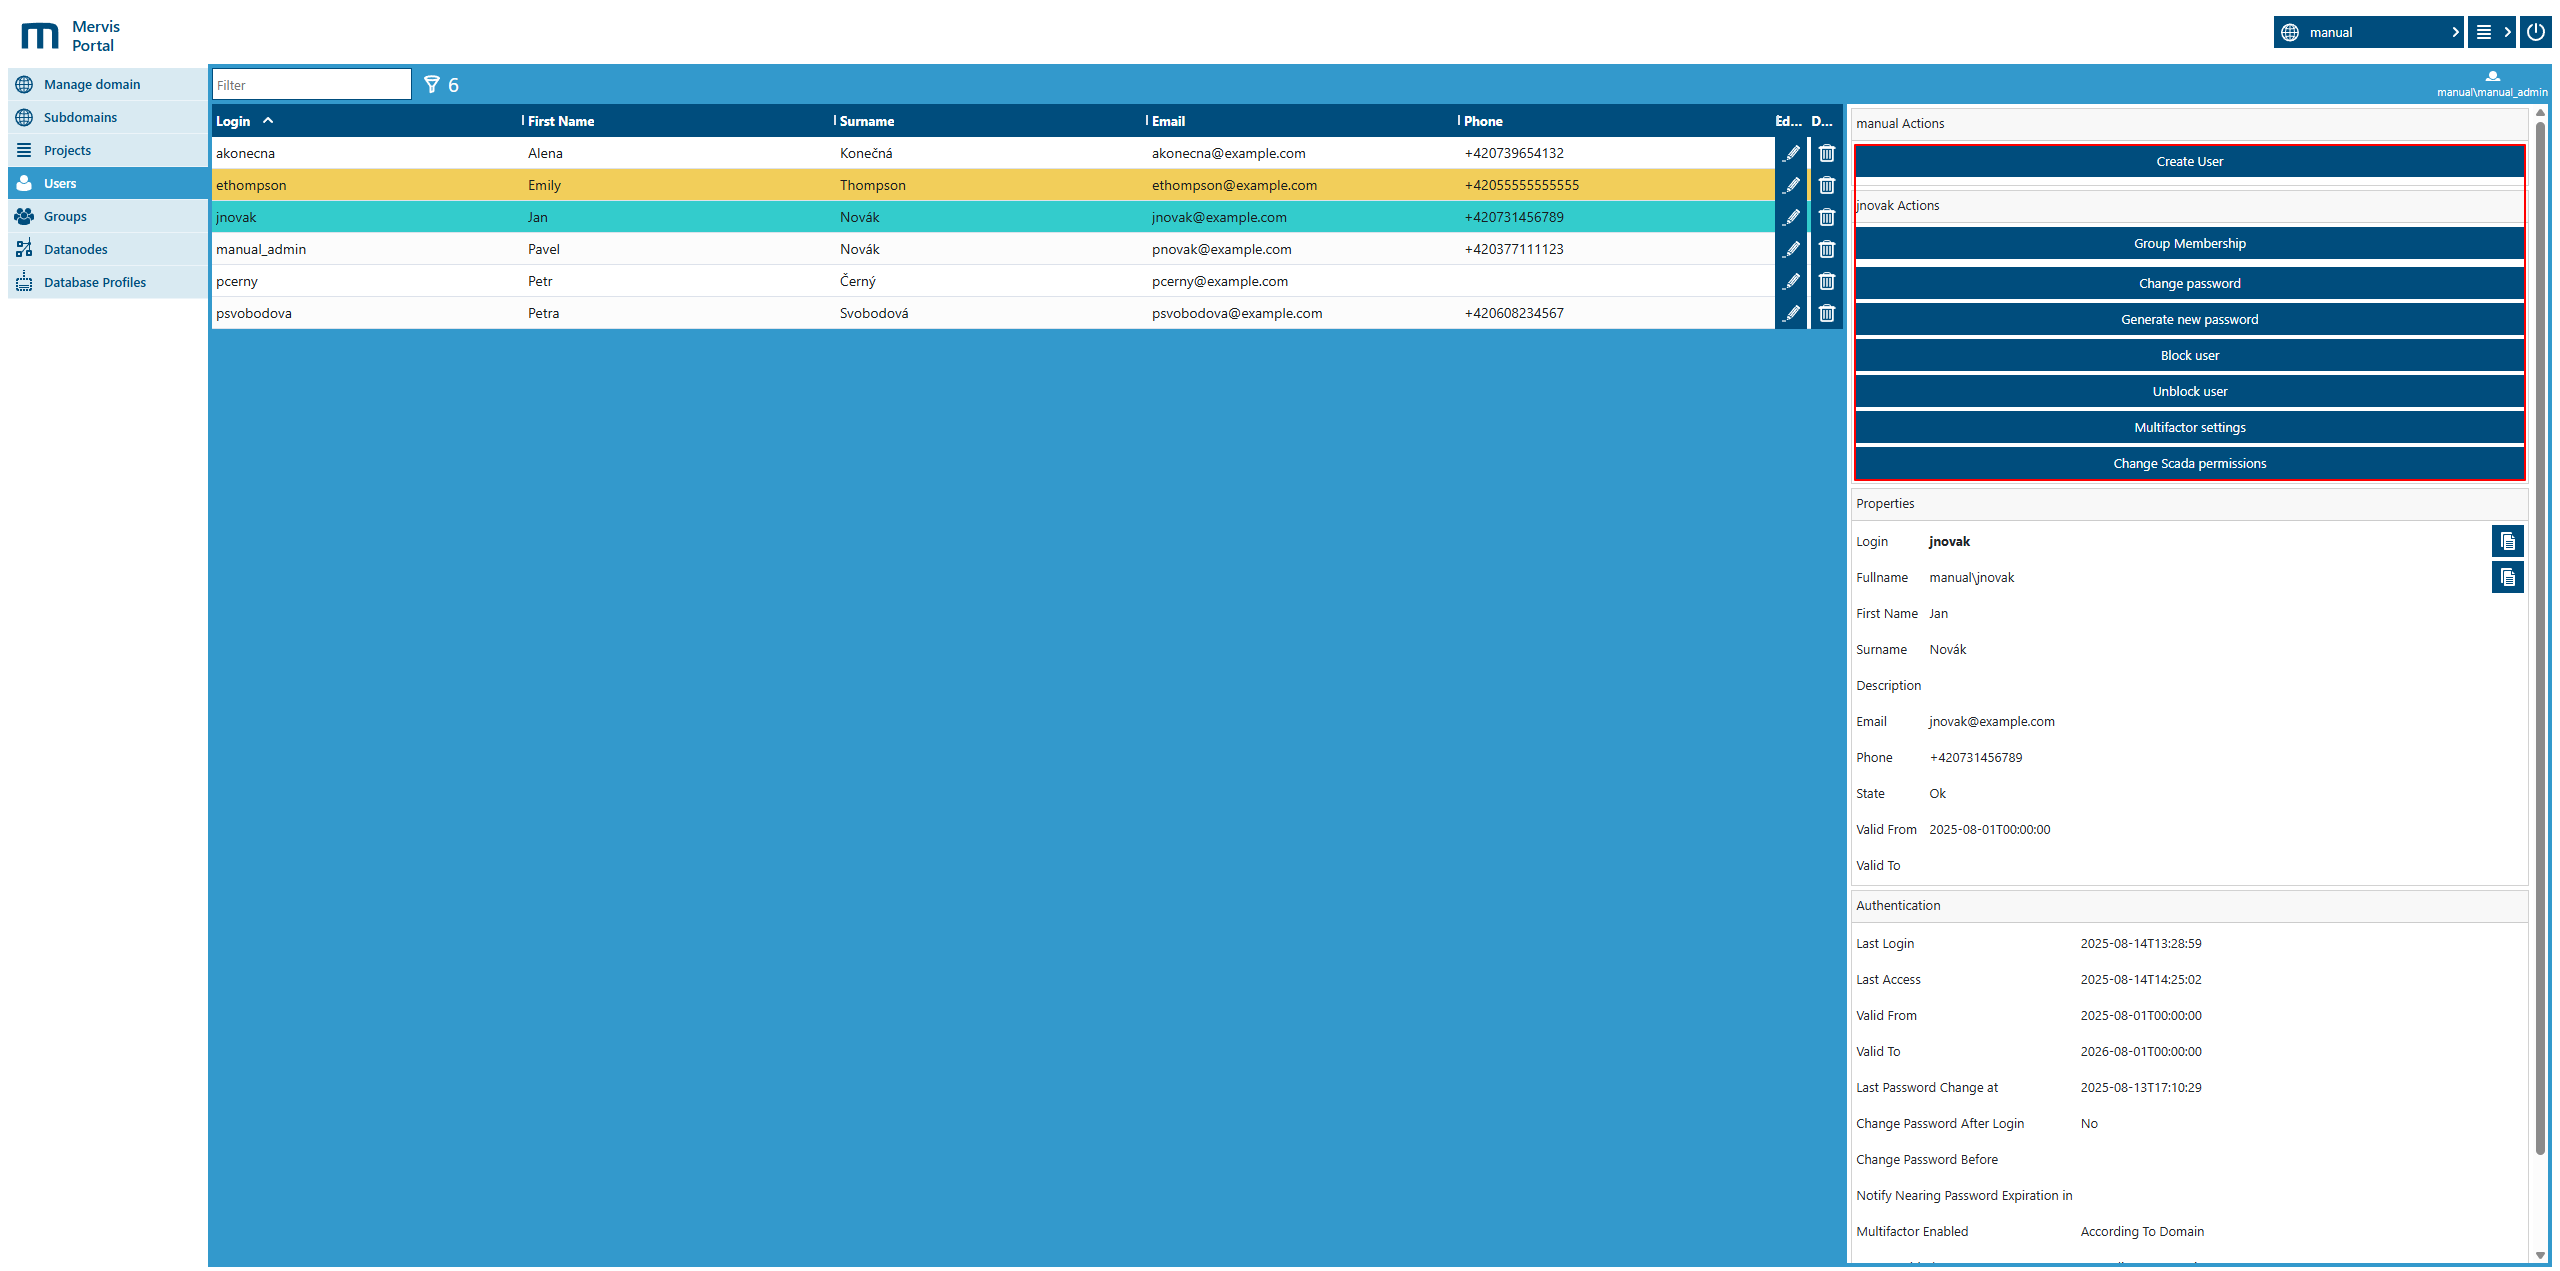
3. Action Panel
At the top of the user detail section, an action panel includes the following:
- Create User – opens the form to create a new user account
- Group Membership – manage the user’s group memberships
- Change Password – manually change the user's password
- Generate New Password – generate and send a temporary password the user must change at first login
- Block User – deactivate the user account
- Unblock User – reactivate the user account
- Multifactor Settings – configure multifactor authentication
- Change SCADA Permissions – manage SCADA permissions for the selected user
3.1 Create User
The user creation form is opened by clicking Create User in the action panel.
The dialog window allows you to set the following fields:
| Field | Description |
|---|---|
| Login | User login name (required) |
| Generate and send password | Option to auto-generate and send a password |
| New password | Manually enter a new password (required if auto-generation is not used) |
| Confirm password | Must match the New password |
| First Name | User’s first name |
| Surname | User’s last name |
| Description | Optional note or description |
| User’s email address | |
| Phone | User’s phone number |
| Valid From | Start of account validity |
| Valid To | End of account validity |
| Authentication – Valid From | Login credentials start date |
| Authentication – Valid To | Login credentials end date |
| Change Password After Login | Require password change at first login |
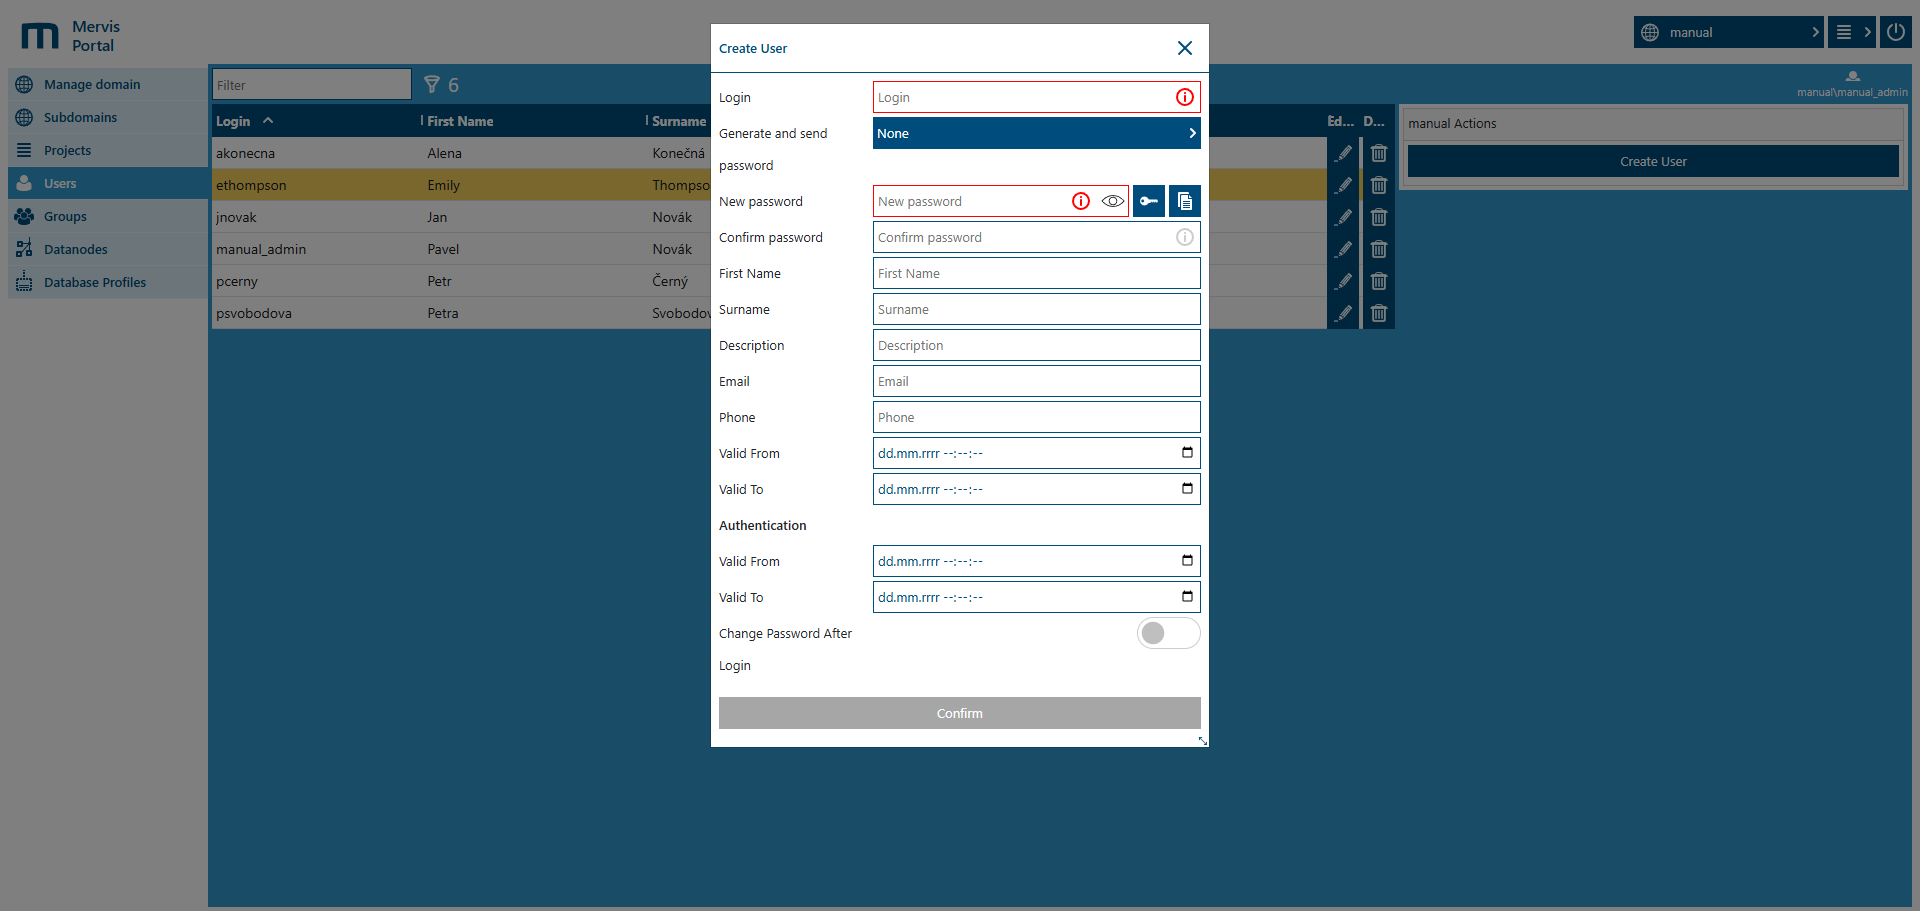
3.1.1 Steps to Create a New User
1. Open the Users section from the portal’s left menu.
2. Click Create User on the right side of the screen.
3. Fill in required fields:
- Login – user login
- New password and Confirm password – or use *Generate and send password*
4. Optionally fill in:
- First Name, Surname
- Description (e.g., role, department)
- Email, Phone
5. Set account validity:
- Valid From / Valid To
6. Set login credentials validity under Authentication:
- Valid From / Valid To
7. (Optional) Enable Change Password After Login
8. Click Confirm to create the account.
9. The new user appears in the list and can now log in.
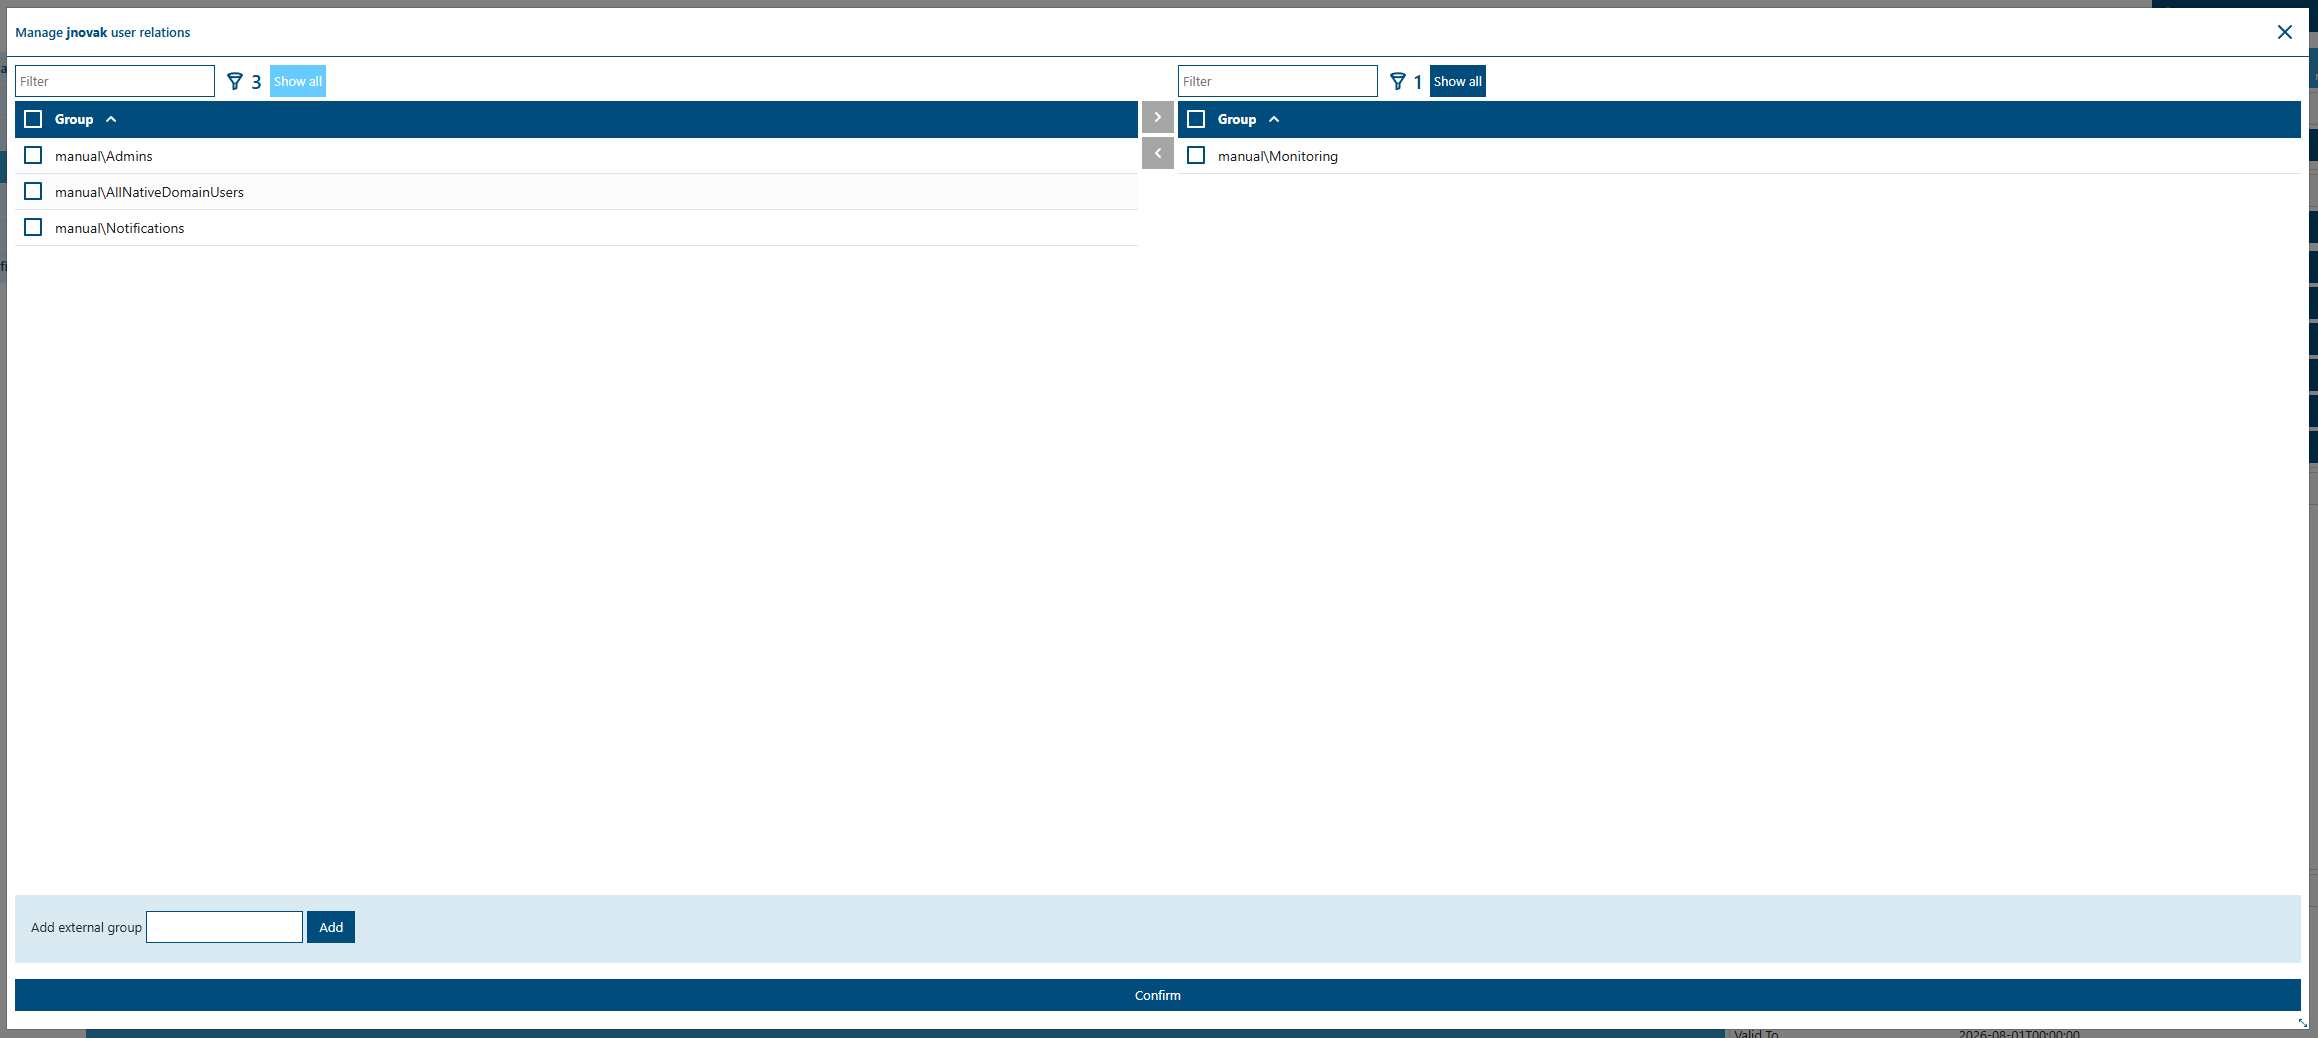
3.2 Group Membership
This function allows adding or removing users from groups. Group membership defines the user's permissions and access scope.
3.2.1 Role-Based Access Control (RBAC)
Mervis SCADA utilizes group-based permissions to establish specialized user roles (such as Viewer, Operator, QA, Engineer, or Admin). Rather than selecting a hard-coded role, administrators create designated groups, assign the specific read/write/manage permissions required for that role to the group, and then assign users to that specific group.
The Manage user relations modal window includes:
- Left panel – all groups in the domain
- Right panel – groups the user currently belongs to
Between the panels are arrow buttons for assigning or removing groups. Each panel includes a Filter field and a Show all switch to include or exclude special “system” groups:
- Legacy groups like ProjectGuid_READ / ProjectGuid_WRITE – tied to older project rights; may not apply to new Portal-created projects
- Domain-wide group – includes all users in the domain
At the bottom is Add external group – enter the external group in the format “domain\groupname” and click Add. Save changes with Confirm.
3.3 Change Password
This allows admins to manually change a user’s password. Used when a user forgets their password or immediate reset is required.
| Field | Description |
|---|---|
| New password | Field to enter the new password (required) |
| Confirm password | Must match the New password |
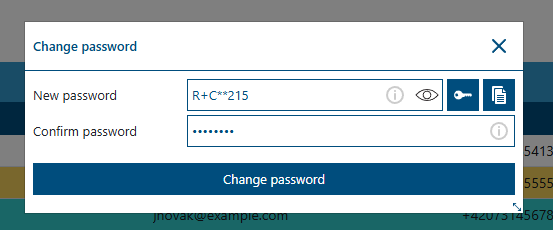
3.3.1 Dialog Controls
Icons to the right of password fields:
- Info icon
 – password requirements help
 - Eye icon
 – toggle password visibility
 - Generator icon
 – auto-generate strong password
 - Copy icon
 – copy password to clipboard
3.3.2 Password Change Steps
1. Select the user from the list
2. Click Change password
3. Enter the New password manually or
- Use to generate one
4. Confirm in Confirm password
5. (Optional) Use ![]() to check input
to check input
6. (Optional) Use ![]() to copy and share
to copy and share
7. Click Change password to save
8. The dialog will close and the password is changed immediately
⚠️ Warning: After the password is changed, the user will be logged out of all sessions and must log in again with the new password.
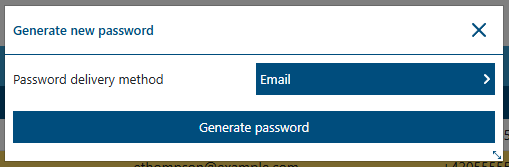
3.4 Generate New Password
Allows generating a new password and choosing how to deliver it – email or SMS. User must have the appropriate contact info set.
3.5 Block User / Unblock User
The Block User button sets the account status to Blocked. This disables the account — the user cannot log in or perform any actions. It does not delete user data or history.
Unblock User restores the account status to Ok, reactivating access. *Note: If an account is automatically locked by the system due to exceeding the maximum allowed failed login attempts (default is 5), a user with User Management privileges must use the Unblock User function to reactivate the account.*
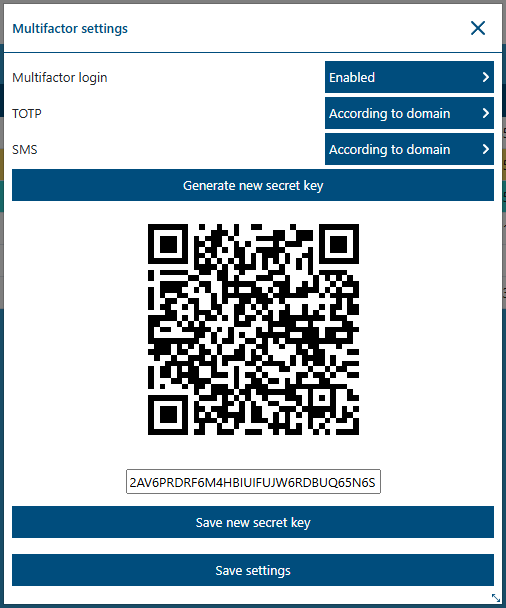
3.6 Multifactor Settings
The Multifactor settings button opens a dialog to configure 2FA (TOTP or SMS).
3.6.1 What is 2FA?
Two-Factor Authentication (2FA) adds a second layer of security — like SMS or a time-limited one-time code (TOTP). This significantly improves account safety.
| Field | Description |
|---|---|
| Multifactor login | Master switch to enable/disable 2FA |
| TOTP | TOTP-based authentication settings |
| SMS | SMS authentication (phone number must be set) |
| Generate new secret key | Generates a QR code and secret key |
3.6.2 TOTP or SMS Setup
- Both TOTP and SMS support the “According to domain” option
- You can enable either or both methods simultaneously
3.6.3 2FA Setup with TOTP
1. Enable Multifactor login
2. Enable TOTP
3. To generate a secret key:
- Click Generate new secret key
- A QR code and text key will appear
- Scan the QR in your authenticator app or manually enter the key
- Click Save new secret key
4. Save your changes with Save settings
⚠️ Warning: Once 2FA is enabled, logging in requires the correct code. If you lose access to your phone and don’t have a backup, administrator intervention may be needed.
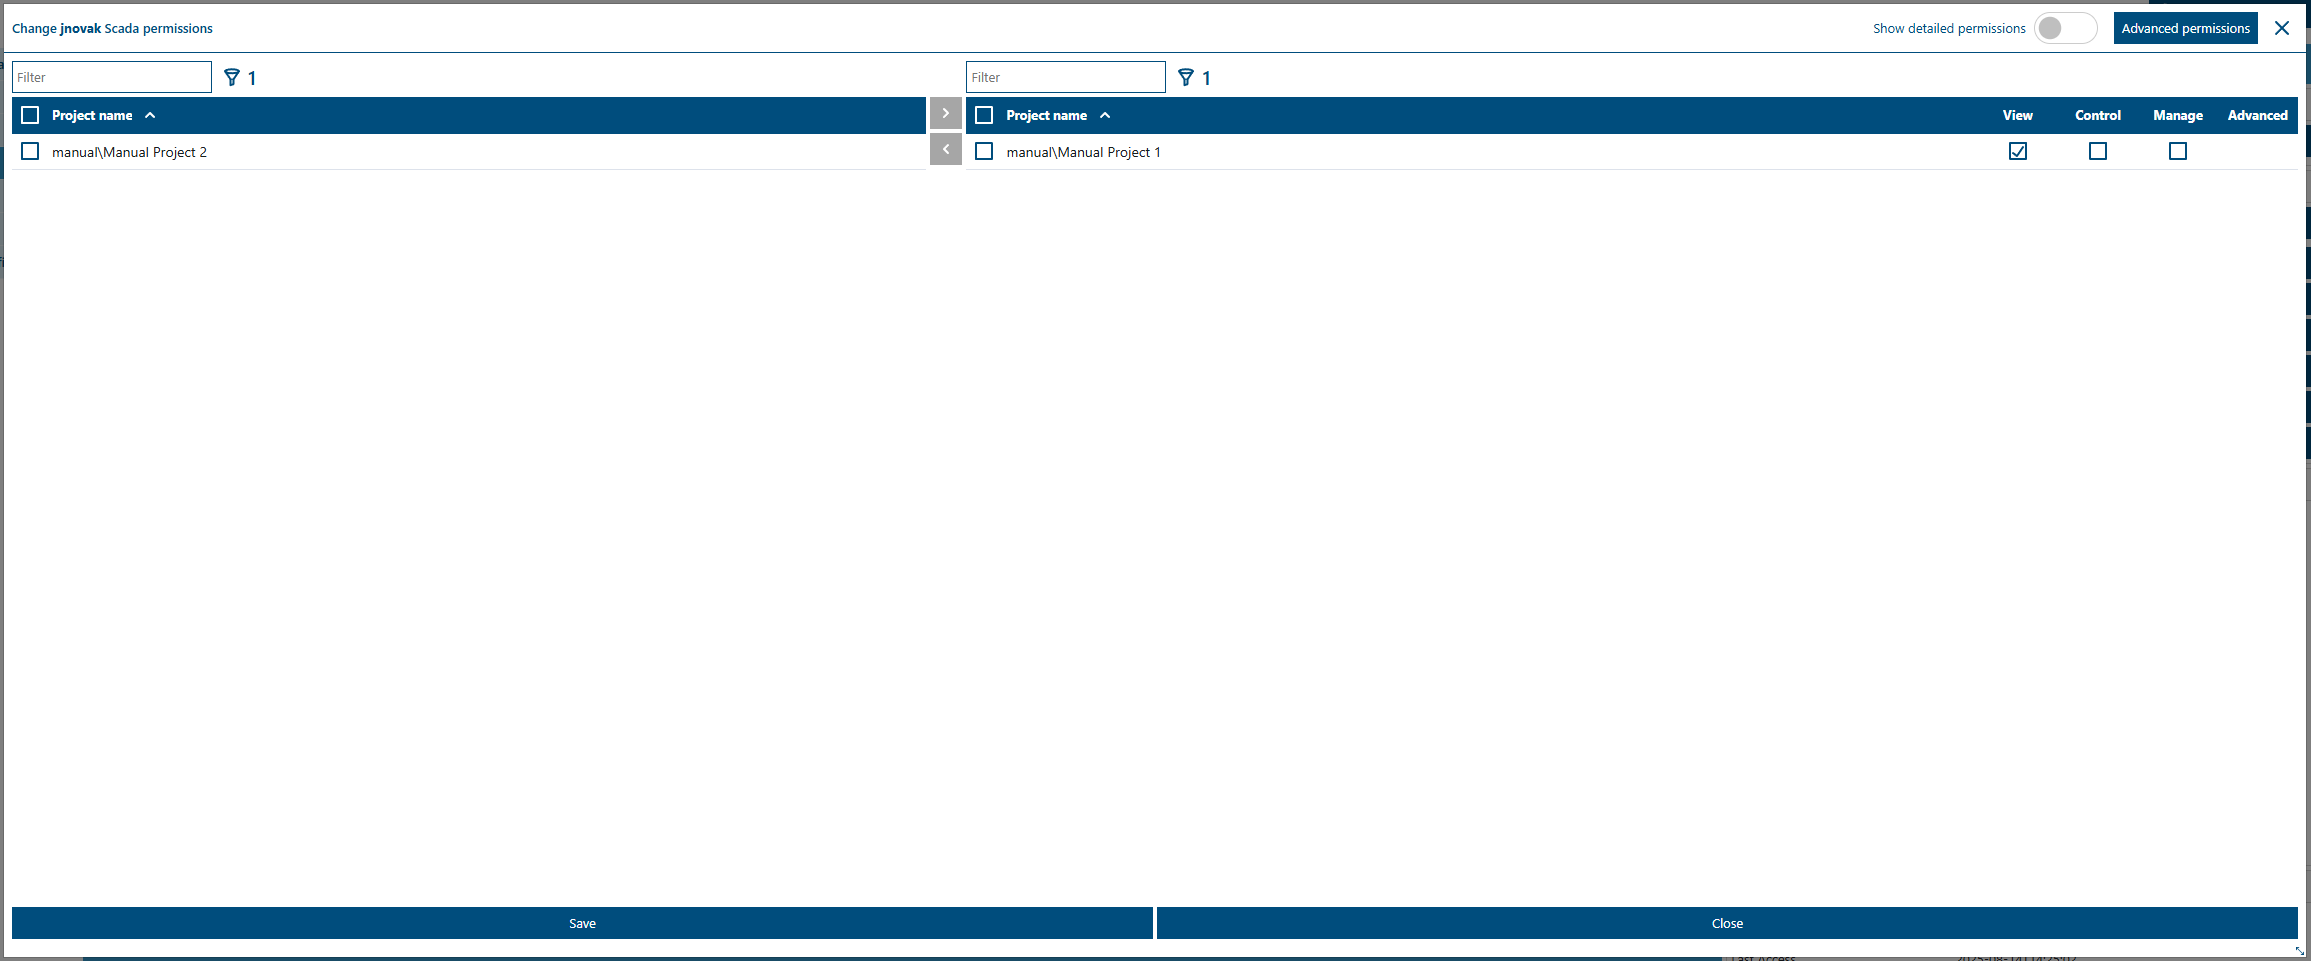
3.7 Change SCADA Permissions
This button opens a modal window for setting SCADA permissions for the selected user. See more in the Permissions section.